Customization
spooning is incredibly flexible.
- To modify the color scheme, implement a custom
TapStyle. - To customize the TAP output, subclass
Tap. - To have complete control over what happens when tests pass/fail, implement a custom
Reporter.
Style
The TAP-producer supports applying a style to the output (see Running Tests for how to apply a style).
A style is defined as a TapStyle object that has
keys corresponding to what part of the output will be styled and
values that define the prefix that will be added.
The prefix (usually comprised of ANSI escape codes) is inserted before the relevant text. For example, you can think of the “ok” part of a result message being rendered like this*:
// See Tap.js
const {Ok, Reset} = this.style;
return `${Ok}ok${Reset}`;
*not the exact implementation but produces the same result
Three predefined styles (Tap.Styles.None, Tap.Styles.Basic and Tap.Styles.Unicode) are provided.
These can serve as a foundation for your custom style.
For additional colors, you can hard-code the escape sequences
or install the ansi-styles package and make use of the provided helpers.
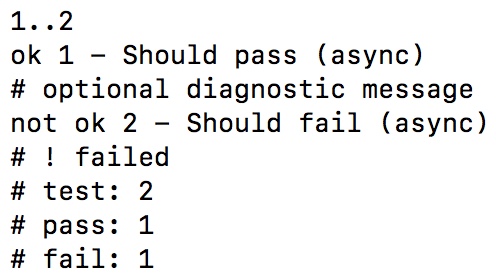
None
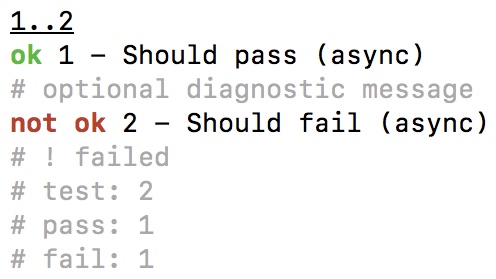
Basic
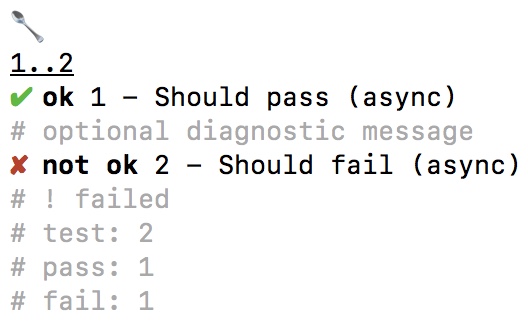
Unicode
Subclassing
When you require('spooning'), a shared instance of TestQueue is returned.
The instance is initialized with the following defaults:
module.exports = new TestQueue(new Reporter(new Tap(), process.stdout));
If you plan to subclass TestQueue itself, you should export an instance of
your subclass which your tests can require:
const {promisify} = require('util');
const {Tap, Reporter, TestQueue} = require('spooning');

class MyTestQueue extends TestQueue
{
    constructor(reporter, options)
    {
        super(reporter, options);

        // expose a promisified version of testPromise for test definition files to use
        this.vow = promisify(this.testPromise);
    }

    _push(name, test, callback)
    {
        super._push(name, test, callback);

        // This subclass will emit a 'push' event when a test is added to the queue
        this.emit('push', {name, test});
    }
}

module.exports = new MyTestQueue(new Reporter(new Tap(), process.stdout));
spooning exports it’s constitute classes alongside the shared instance.
If you plan to export an alternate test queue instance, you should probably also
export any classes/utilities used by your tests (UnexpectedOutputError,
acEx, etc).
Otherwise, your tests will need a separate require call to the spooning package.
See index.js
To make use of a custom Tap subclass and/or Reporter implementation,
you have two options:
- You can export a custom instance of
TestQueuethat was initialized by passing instances of your custom classes to the constructor (as described above). - You can set the relevant property of the shared
TestQueueinstance in your run.js file.
Custom Tap
// run.js
const {run, exit, reporter, Tap} = require('spooning');

class MyTap extends Tap
{
    handleEnd({total, passed})
    {
        // this subclass changes the "footer" output
        return this.renderDiagnostic(`done: ${passed}/${total}`);
    }
}

reporter.tap = new MyTap();

require('./src');

run(exit);
Custom Reporter
// run.js
const spooning = require('spooning');
const {run, exit} = spooning;

class MyReporter
{
    constructor()
    {
        this.expected = 0;
        this.results = [];
    }

    runStart(info, callback)
    {
        // handle start of queue execution
        this.expected = info.count;
        callback();
    }

    runEnd(info, callback)
    {
        // handle end of queue execution
        //  do something with collected results (make an HTTP request, invoke a lambda, etc)
        console.log(`${info.passed}/${info.total}`, this.results);
        callback();
    }

    testResult(info, callback)
    {
        // handle a test result
        this.results.push(info);
        callback();
    }
}

spooning.reporter = new MyReporter();

require('./src');

run(exit);
Notice that the MyReporter class does not need to subclass Reporter (although it could if it would be useful).
The only requirement for a “Reporter” is that it implements the three methods shown in the example
and calls the provided callback when done. Passing an error to the callback will cause it to be emitted by it’s parent
TestQueue (so test result errors should not be passed, only errors encountered while reporting on the test result).
The End
You’ve reached the end of the User Guide. Continue to the API Documentation for technical information and implementation details.